These Incredibles Logo Mouse Ears Will Make You Feel Super
When you make these Incredibles logo mouse ears and wear them to the park you will get a lot of attention and quite a few compliments. Especially if you wear them to Disney California Adventure and stroll down Pixar Pier. My sister and I had a fun day in the parks wearing a pair and you can too.
Here’s the tutorial video

Incredibles Logo DIY Mouse Ears
![]()
MATERIALS YOU WILL NEED
Black satin headband
red, black orange and yellow craft foam
small scissors
tacky glue and a paintbrush
hot glue gun and glue sticks
STEP BY STEP INSTRUCTIONS
You can find the Incredibles logo online and size it to mouse ears size and print it out. Or you can download the pattern I used at the link below the video.
Trim out one ear to use as a pattern to cut your foam and leave one ear un-cut so you can use it as a guide for placement during the gluing portion of the project.
The first part is the cutting portion. You are going to cut out each piece of the logo from largest to smallest. That means you are going to start with the red ear, because it is the largest piece. For the whole project you need to cut two of everything. But for the red ear shapes, you should cut 4 pieces and glue them together for stability. And speaking of stability, do not use the craft foam you can get at the dollar store for your ears. That foam is paper thin and will not hold its shape.
After you have traced and cut four red ear shapes the black circle is the next largest item. Cut two black ovals.
The orange swooshes are the next item to carefully trim out of the pattern. Then trace the shapes on craft foam and trim out two sets of swooshes.
And finally the yellow letter I’s are last. Trace around and cut out two sets of I’s. I used really thin craft foam for this portion, since the stability of these little pieces do not matter as much
When you have all of your pieces cut out, it is time to start gluing them together. Use the un-cut side of the pattern to get the correct placement on each piece. You want to make two exact Incredibles logos. Do not make one logo ear and one mirror image ear. They won’t look right when you wear them. Glue the logos to the red ear using white tacky glue, with a paintbrush to spread it. Unlike hot glue, this white glue will allow the logo to lie flat and it will dry invisible.
Once you have the logos glued, you can attach them to the red ears with hot glue or tacky glue. Then, it’s time to glue the red ear pieces together. Let the ears dry for a while before assembling the entire project. When the ears have dried, take your scissors and trim the rounded bottoms of the ears to make sure they are flush and even, before attaching them to the headband with hot glue.
I used a plastic headband when I filmed this video but I learned an important lesson NOT to use a plastic headband with hot glue and craft foam. The ears will pop off the first time you use them. Make sure to hot glue your ears to a satin- or fabric-covered headband instead, and let the glue soak into the fabric and really grip it so your ears will last for many trips to the parks.
Once the hot glue has cooled, your Incredibles logo mouse ears are done. It’s time to wear them to the parks and be sure you are ready to get lots of attention and compliments. I know I did.
Thanks for crafting with me. If you make a pair of Incredibles logo mouse ears or any other Disney or Pixar-inspired craft leave me a comment and let me know, or tag a photo on Twitter or Instagram #geekymcfangirl or #craftymcfangirl. I’d love to see what you do!
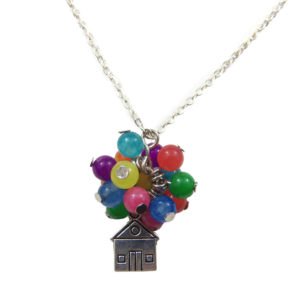
Fandom Jewelry from GeekyMcFangirl.com
Disney Jewelry: Up Necklace. This colorful balloon necklace is inspired by Disney’s Up. Each necklace is unique. A perfect gift from Geekymcfangirl.com. This Up necklace is handmade with glass beads and a metal house charm. The chain is silver plated, the charm is silver tone metal and the closure is a lobster clasp. It is 18 inches in length. If you need a smaller or larger size, custom sizing comes at no extra cost.
Some of the links in this post are affiliate links. Thank you in advance for shopping with them and supporting me. Any purchases you make, help me develop more craft projects for craftymcfangirl.com and film more tutorial videos for the GeekyMcFangirl YouTube channel. You are awesome!
I am a PLAID Ambassador. While I am not being paid to promote their brand, I do receive PLAID brand craft materials to use in my blog posts and videos. Mod Podge is my favorite PLAID product and I am proud to be a PLAID ambassador and to recommend their products. All opinions are my own.