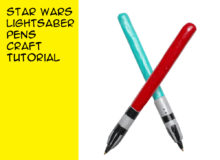
How to make a Lightsaber pen with polymer clay

This Star Wars craft tutorial will show you how to make a lightsaber pen out of polymer clay. This DIY craft tutorial is perfect for any Star Wars fan and a great back to school craft project.
Here’s the tutorial video
How to make a Lightsaber Pen

MATERIALS YOU WILL NEED
polymer clay
Bic round stic pens
Martha Stewart beetle black acrylic paint
Mod Podge gloss
Paint brushes
small pliers
small pan to bake on
STEP BY STEP INSTRUCTIONS
Before working with the clay, the first step is to use a small plier to remove the ink from two bic round stic pens. These pens are strong enough to make it through the baking process as long as you don’t leave them in to bake too long. You cannot bake the pens with the ink inside, it will melt!
For this project I am going to use three colors of clay, light blue, red and silver. But of course, you can make any color light saber pens that you want. Go crazy with your imagination.
Condition a piece of blue clay and then roll it out wide enough to wrap a pen and long enough to fit the pen length. Trim the excess and then carefully wrap and shape the clay around the pen, leaving the front portion blank for the handle later. cut a nice clean edge where the handle will meet the blade.
Pop this into the oven for a very short time, 5 minutes should be enough if the oven has been preheated.
While the clay is baking it is time to start the second pen. Repeat the process with red clay. I like to wear a pair of gloves when I work with red clay because it can easily stain your hands and fingers.
I pulled the blue pen out of the oven and reinserted the ink while it was still warm. The reason I do this is just in case the pen nib has started to melt or soften in the oven this makes sure that the ink can be put back in at the end of the project. Check on this throughout the project. Nothing worse than finishing a clay pen project and not being able to get the ink back in.
Use the blue pen as a gauge for the red pen, Make sure that the blade length is the same on both. Once the red clay is smoothed and trimmed to your liking, into the oven it goes.
While the red pen is baking, I am work on the silver handle of the blue light saber. With silver clay, cover the front of the pen up to the ink cartridge tip. Leave that uncovered so that the ink can be removed for baking and replaced when it runs out.
When the red pen is baked and completely cooled, it’s time to add a silver handle to the pen. Again, leaving a space for the ink cartridge. Then into the oven to bake the handles for a short time. Remember to remove the ink before you bake and keep an eye on the plastic to make sure it is not melting.
When the pens come out of the oven, reinsert the ink cartridges to make sure the tips have not melted or softened into a weird shape.
To decorate the handles I started with a water-based black pen, and and fine tipped sharpie liner. Eventually I moved to a beetle black acrylic paint from Martha Stewart. It stuck to the clay a bit better than the pens did and gave better coverage. Before you start on the handle designs, make sure the pens are completely cool. You can follow a classic light saber handle design or create your own. Have fun painting. I found I had success with simple shapes.
The final step is to coat the pens with gloss mod podge to protect your handle designs and add shine to the blades. Start by coating the handle portions, and then set them upside down in a glass or jar to dry. When the gloss on the handles is dry, it is time to coat the blade sides with gloss mod podge. Then set them right side up in a glass to dry again. Mod Podge will cure completely in 28 days. If you have the time and patience, put your pens somewhere safe to cure. But if not, you can use your pens in a few hours when the Mod Podge is completely dry.
Thanks for crafting with me. If you make a lightsaber pen or any other Star Wars-inspired craft leave me a comment and let me know, or tag a photo on Twitter or Instagram #geekymcfangirl or #craftymcfangirl. I’d love to see what you do!

Fandom Jewelry from GeekyMcFangirl.com
Star Wars Jewelry: Darth Vader Key Chain. You want this key chain. Search your feelings; you know it to be true. This Star Wars Darth Vader Key Chain is a handmade resin charm pendant. Join the Dark Side with this perfect accessory from Geekymcfangirl.com
Some of the links in this post are affiliate links. Thank you in advance for shopping with them and supporting me. Any purchases you make, help me develop more craft projects for craftymcfangirl.com and film more tutorial videos for the GeekyMcFangirl YouTube channel. You are awesome!
I am a PLAID Ambassador. While I am not being paid to promote their brand, I do receive PLAID brand craft materials to use in my blog posts and videos. Mod Podge is my favorite PLAID product and I am proud to be a PLAID ambassador and to recommend their products. All opinions are my own.