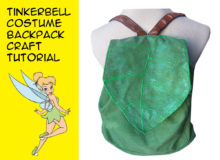
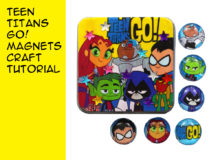
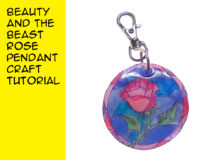
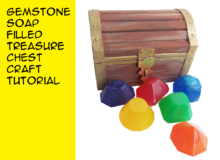
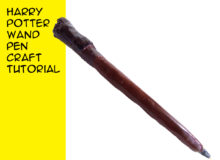
Make The Elder Wand, No Thestral Tail Hair Required

The Elder Wand is said to be the most powerful wand that has ever existed, able to perform feats of magic that would normally be considered impossible. Now you can make your own Elder Wand replica for cosplay or display. And don’t worry; no Thestral tail hair is required for this Harry Potter DIY.
Here’s the tutorial video
How To Make The Elder Wand

MATERIALS YOU WILL NEED
something to bake your project on:
silicone mat
baking tray
a long chopstick or dowel rod
polymer clay of any color
clay tools
brown paint
white paint
mod podge hard coat
paint brush
fine tipped black marker
STEP BY STEP INSTRUCTIONS
Start with an image of the Elder Wand to work from. Work on a silicone mat on top of a baking tray. This way you can move your project right into the oven without having to transfer it.
Use a long chopstick, a dowel rod or whatever you have at home that is the right size. Do not use plastic. Whatever you use as the base of your wand will have to survive being baked in the oven.
You can use any color of polymer clay you want.
Condition and soften your clay and separate it into 8 sections of varying sizes.
Form 6 bulbs on the chopstick from small to large, using your picture reference to get the general size, shape and spacing correct.
Use a 7th piece of clay to connect the two bulbs on the end.
Use your clay tools to make indentations in the clay. Use the back of a paint brush or any tools you have on hand to push small irregular circles into the clay.
Use the 8th piece of clay to create the end piece of the wand. Form a round triangle shape with a slightly concave top. Then attach the piece to a paintbrush handle, to create a hole for the chopstick to attach, and make it easier to add the pattern. Use a clay tool to make 6 or 7 vertical indentations in the end cap. Then carefully remove it and apply it to the wand. Connect the clay to the wand using a smoothing tool. And your wand is ready to bake.
Bake according to the time and temperature on your clay package. Baking time will vary.
Once your wand is baked and completely cooled, it’s time to paint the entire thing with Burnt Umber paint. It may take two or three coats of paint to get opaque coverage, depending on the color of the polymer clay you used.
Once your painted wand is completely dry, paint a white band between the 4th and 5th nodes of the wand. Let the white paint dry completely before continuing.
When the white paint is dry, it’s time to add the magical markings. You can find a diagram of the markings online for reference. Working slowly and carefully, freehand the pattern with a fine tipped black marker.
Once the pattern is done the final step it to add a coat of Mod Podge hard coat to the entire wand. When the mod podge is completely dry, your elder wand is done.
Thanks for crafting with me. If you make The Elder Wand or any other Harry Potter-inspired craft leave me a comment and let me know, or tag a photo on Twitter or Instagram #craftymcfangirl. I’d love to see what you do!

Fandom Jewelry from GeekyMcFangirl.com
Harry Potter-inspired Owl post necklace. This Harry Potter jewelry will remind you that not all heroes are human. This necklace makes a perfect gift for yourself or your favorite Harry Potter Fan.
Some of the links in this post are affiliate links. Thank you in advance for shopping with them and supporting me. Any purchases you make help me develop more craft projects for craftymcfangirl.com and film more tutorial videos for the GeekyMcFangirl YouTube channel. You are awesome!


October 12, 2018 @ 5:17 pm
fantastic tutorial. thank you so much.