Two Harry Potter DIYs : A Tom Riddle Diary and Quill Pen

Save yourself a shopping trip to Diagon Alley, and make a Tom Riddle Diary and Quill pen for back to school at Hogwarts! And if you are off to Muggle School instead, this journal and pen set will really set you apart. Disclaimer: Basilisk fang not included.
This video is a COLLABORATION with TheAshHeart5000 Here is a link to her video!
Here’s the tutorial video
How To Make A Tom Riddle Diary and Quill Pen

MATERIALS YOU WILL NEED
black journal or sketch book
furniture corners
pliers
black mat board
cutting mat
cutting blade
ruler
metallic gold pen
strong glue like E6000
white turkey feather
ballpoint pen
scissors
paint brush
brown ink
STEP BY STEP INSTRUCTIONS
Tom Riddle’s Diary:
Start with a plain black journal or diary. You will need four metal furniture corners. The ones I am using are linked above. I think they are a really good match for the diary in the movie. Place a corner on the journal and bend the metal around the cover with your fingers. Then use pliers to tighten the metal down so that the corner is on securely. Then repeat the process with the other three corners.
Measure the width of your diary. Mine is 5 inches wide. Then measure and mark a piece of black mat board that is ¾ inch by 4 inches. Use an Xacto blade and ruler or a pair of scissors to cut out the piece.
Google an image to use as a guide for the nameplate. Use a ruler to mark the gold border on all four edges. The lines should be imperfect and broken. Then carefully letter the name onto the nameplate. Try to space the words out correctly. And if you make a mistake, you can always cut out another piece of mat board and try again.
The final step is to glue the nameplate on with a strong glue like E6000. Once the glue is dry your diary is done.
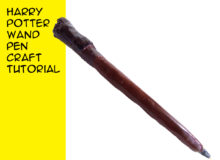
Quill pen:
Start by searching online for an image to guide you.
Using a paintbrush and brown ink, paint the brown stripes onto the white feather. I tried using acrylic paint, but it did not color the feather as well as ink did. If you use paint instead, make sure it is very watered down so it will be thin when you brush it on, kind of like ink. Let the ink dry completely before continuing.
Once the ink is dry, it’s time to add the pen. Use scissors to clip off the tip of the feather stem. Then use a skewer or thin object to make sure the inside of the feather is clear.
Next it’s time to disassemble a ballpoint pen and remove the ink cartridge. Measure how much of the cartridge will fit into the feather, and use scissors to snip off any extra. Then apply some E6000 glue to the very end of the cartridge. Slowly twist and push the cartridge into the feather. Make sure that the glue is being spread evenly and pushed inside the feather as well.
Once the glue has dried completely, your quill pen is done.
Thanks for crafting with me. If you make To Riddle’s Diary or any other Harry Potter-inspired craft leave me a comment and let me know, or tag a photo on Twitter or Instagram #craftymcfangirl. I’d love to see what you do!
Fandom Jewelry from GeekyMcFangirl.com
Always Necklace. This Harry Potter Jewelry makes a perfect gift. This 18 inch silver necklace features a stag patronus and a charm that says Always with a heart.
Some of the links in this post are affiliate links. Thank you in advance for shopping with them and supporting me. Any purchases you make help me develop more craft projects for craftymcfangirl.com and film more tutorial videos for the GeekyMcFangirl YouTube channel. You are awesome!
http://www.geekymcfangirl.com/home/product/always-necklace-harry-potter-jewelry/